UV DTF transfer on T-shirts opens exciting possibilities for bold, durable apparel designs. This method blends the flexibility of digital printing with a ready-to-transfer film, delivering vibrant color, fine detail, and broad fabric compatibility. In this concise guide, you will learn how to prepare and apply the transfer and care for garments so they stand up to washing and wear. Whether you are printing for a boutique, a school club, or a personal project, this resource sets you up with a reliable workflow and practical tips. With a clear path from design to finish, you will build confidence in achieving consistent results across different shirts.
For practitioners exploring this technology, think of UV-curable DTF prints that sit on a printable sheet and are fixed to fabric with a controlled heat press. This approach enables detailed imagery and smooth texture across cotton, blends, and some synthetics, opening a world of apparel customization. If you are new to the workflow, a DTF transfer tutorial can guide you through design prep, film handling, and transfer timing. Knowing how to apply a DTF transfer correctly involves meticulous alignment, proper pre-press, and follow-up peeling strategies, with attention to heat press settings for DTF. Finally, practical fabric DTF printing tips—such as swatch testing, color profiling, and choosing fabrics that respond well to transfers—help ensure durability and color accuracy.
Understanding UV DTF transfer on T-shirts: benefits, applications, and why it’s a game changer
UV DTF transfer on T-shirts offers a unique blend of digital print detail and the convenience of a ready-to-transfer film. The UV-curable inks deliver sharp lines, smooth gradients, and vibrant color fidelity while the transfer remains comfortable to the touch after heat pressing. This approach is especially suited for small runs or on-demand designs because you can produce high-resolution artwork without the need for screens.
Compared with traditional screen printing or vinyl, UV DTF transfers excel at reproducing complex images, photographs, and subtle color shifts. They work on a wide range of fabrics and avoid cracking or peeling when properly cured. For boutiques, clubs, and personal projects, this method expands creative options while keeping production efficient and scalable.
Essential tools and materials for DTF on T-shirts
To start with UV DTF transfers, assemble a reliable heat press, UV DTF transfer film, a top protective sheet, and suitable T-shirts (light or dark fabrics). A stable press with even pressure helps ensure consistent adhesion across the design. Always follow the film manufacturer’s recommended temperature—commonly around 320–330°F (160–165°C)—to optimize curing, which aligns with good heat press settings for DTF.
Prepare your workspace with a clean surface, heat-resistant gloves, and a protective silicone sheet. Keep stock of different garment types, since fabric thickness and blends can influence transfer results. For fabric DTF printing tips, test on swatches of cotton, cotton blends, and poly blends to understand how each fabric responds to heat and ink coverage.
Artwork prep for DTF: design considerations and file formats
Artwork should be prepared at high resolution (at least 300 dpi) and color-managed to preserve details in the final transfer. Plan for white underbase if printing on dark fabrics to ensure color opacity and accurate reproduction of light areas.
Use print-ready file formats such as TIFF, PNG, or PDF with embedded color profiles. Ensure your bleed and margins are considered, and perform a pre-press check to remove surface dust. This aligns with the DTF transfer tutorial mindset: validate the design before printing.
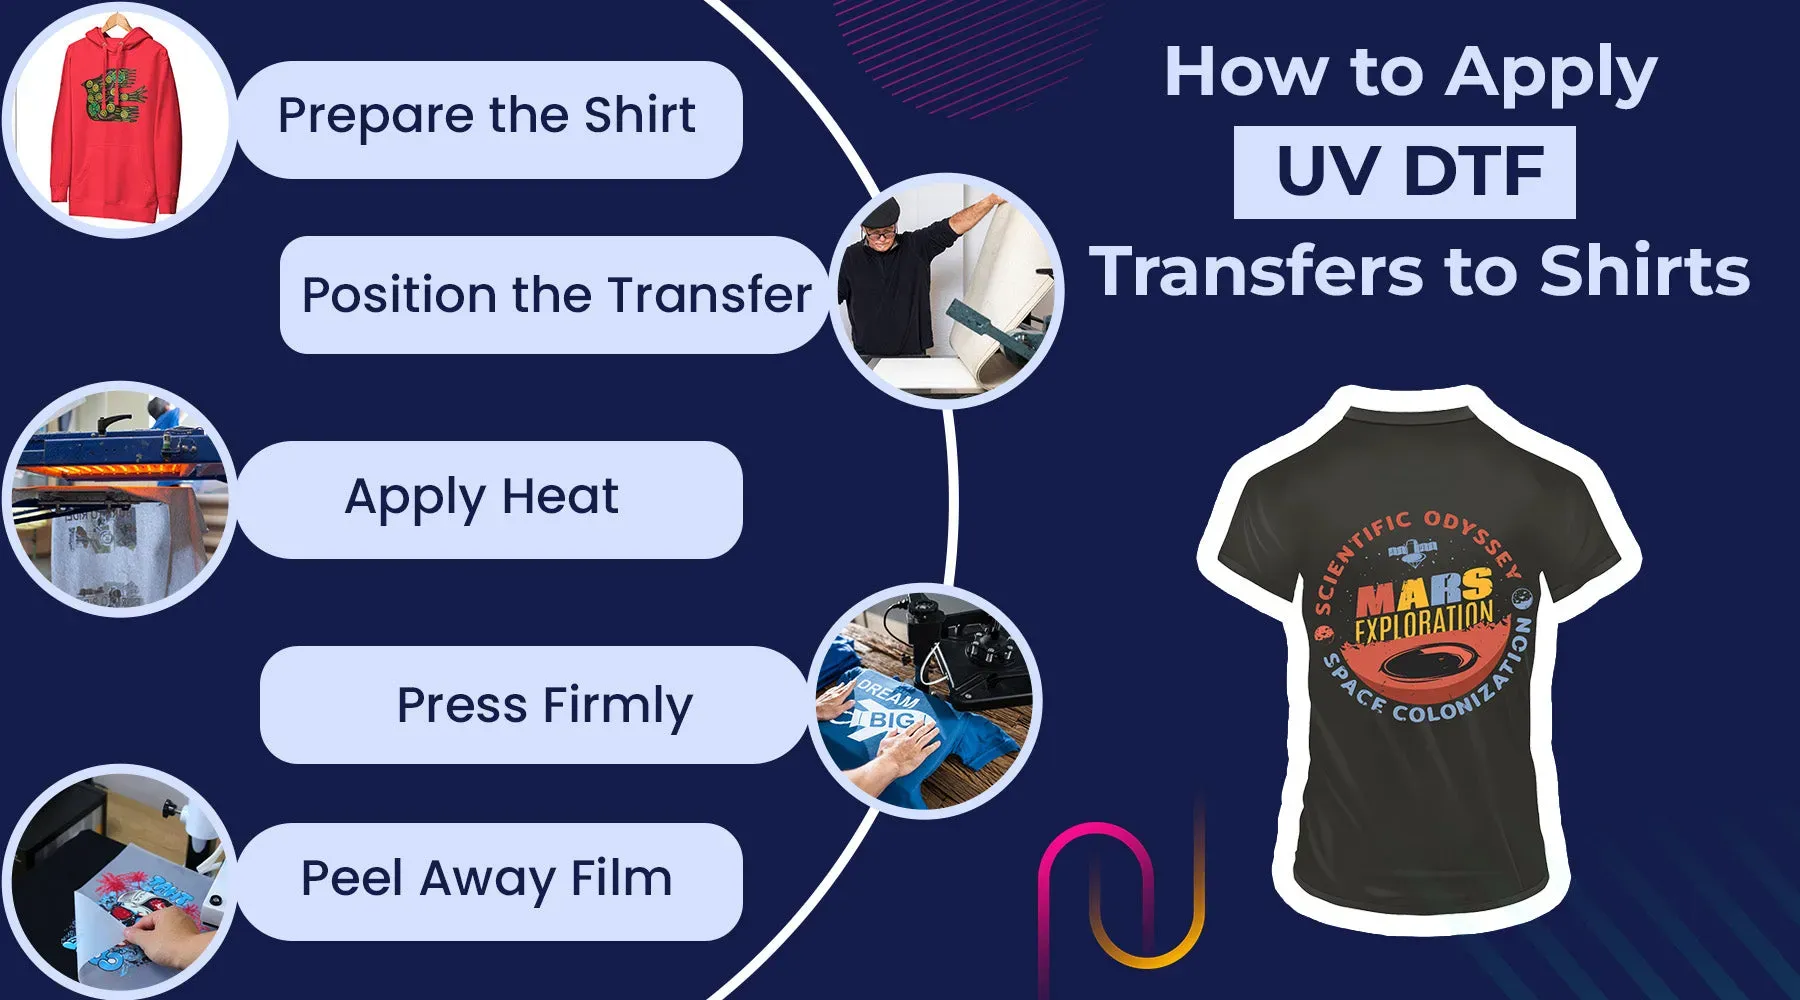
Step-by-step guide: how to apply a DTF transfer on T-shirts
Pre-press: preheat the press to the recommended temperature, align the shirt, and remove moisture with a brief pre-press session. Position the UV DTF transfer film face down and secure with low-tack tape to prevent shifting, which is a practical application of how to apply a DTF transfer.
Transfer: cover with protective sheet and press for the recommended duration (commonly 12–15 seconds) with firm, even pressure. Depending on the film, execute a warm peel or cold peel as instructed. Then peel while warm or once cooled, and perform a short re-press if needed for complete adhesion. This section also reinforces heat press settings for DTF to optimize results.
Quality control and troubleshooting for DTF prints
Quality control: verify color accuracy, check for misregistration, and ensure adhesion across edges. If colors look muted, adjust color profiles or re-check the white underbase on dark fabrics. This is where fabric DTF printing tips come into play to guide adjustments.
Common issues include ghosting, under-adhesion, or edge curling. Re-press with even pressure and inspect the surface for debris before re-pressing. Ensure the garment stays flat and avoid stretching during initial cooling. Tailor adjustments using the fabric DTF printing tips to achieve consistent results.
Post-care and long-term durability of UV DTF transfers
Care after transfer is critical to long-term durability. Wash shirts inside out in cold water with a gentle detergent and avoid bleach. Dry on low heat or air dry to protect color and adhesion.
Store finished garments away from direct sunlight and test longevity by performing a few washes. For ongoing projects, document heat press settings for DTF and fabric types to build a repeatable workflow while following a DTF transfer tutorial for refinement. This ensures durable results and a scalable process.
Frequently Asked Questions
What is UV DTF transfer on T-shirts and why choose it?
UV DTF transfer on T-shirts uses UV-curable inks printed on a transfer film, which is cured with UV light and then heat-pressed onto fabric. The result is highly detailed images with a smooth finish, reduced texture, and durability for washing and wear. It offers strong color accuracy, especially for gradients and photography, and works on many fabrics, making it a versatile option for bold apparel designs.
How to apply a UV DTF transfer on T-shirts? (DTF transfer tutorial)
Follow this DTF transfer tutorial outline: gather materials (UV DTF transfer film, heat press, protective top sheet, T-shirt); pre-press the garment to remove moisture; position the transfer correctly on the shirt; press at the recommended temperature and time (typically around 320–330°F / 160–165°C for 12–15 seconds with medium to firm pressure) and follow the film’s peel guidance (warm or cold); remove the carrier while warm or cold as specified, then allow the shirt to cool and cure.
What are the heat press settings for DTF when performing UV DTF transfer on T-shirts?
Common starting settings for UV DTF transfer on T-shirts are 320–330°F (160–165°C) for 12–15 seconds with medium to firm pressure. Pre-press for 3–5 seconds to remove moisture, use a silicone sheet, and ensure even pressure across the design. Always follow the transfer film’s specific instructions for best results.
Which fabrics and materials work best for UV DTF transfer on T-shirts? (fabric DTF printing tips)
Cotton and cotton-blend T-shirts usually yield bright, accurate results for UV DTF transfers on T-shirts. Light fabrics tend to deliver cleaner color fidelity, while you may need a white underbase for dark fabrics. Use the recommended carrier sheets and top sheets, prepare a clean surface, and consider fabric DTF printing tips such as testing on swatches before full runs.
What are common issues and how to troubleshoot UV DTF transfer on T-shirts? (how to apply a DTF transfer)
Common issues include color shifts or dullness, poor adhesion at edges, ghosting, and edge curling. Troubleshoot by checking color profiles and press window, confirming even pressure and a flat garment, removing debris before pressing, and ensuring proper pre-press. For misregistration, re-check alignment before pressing. When learning how to apply a DTF transfer, follow the process carefully and verify steps with a test piece.
How should I care for UV DTF transfer on T-shirts after application to maximize durability? (fabric DTF printing tips)
Care the garment by washing inside out in cold water with a gentle detergent, and drying on low heat or air dry. Avoid bleach and harsh chemicals for the first washes. Let the transfer cure for up to 24 hours if possible before heavy wear. For longevity, store away from direct sunlight and practice recommended fabric DTF printing tips for post-care.
| Key Point | Summary |
|---|---|
| What is UV DTF transfer on T-shirts? | A sheet printed with UV-curable inks, cured by UV light, then transferred onto fabric via a heat press; yields detailed images, a smooth surface, and durable adhesion, with strong color fidelity, especially for complex artwork, compared to screen printing or vinyl. |
| Why choose UV DTF over traditional methods? | Offers greater color accuracy, gradients, and photographic imagery; prints on a wide range of fabrics with minimal texture; versatile for tees, hoodies, totes. |
| Materials and equipment | Heat press or home press; UV DTF transfer film with UV-curable inks; protective top sheet; T-shirts (cotton or cotton-blend); silicone sheet or parchment; heat-resistant gloves; isopropyl alcohol/cleaner; clean workspace. |
| Design prep considerations | Aim for 300 dpi final print; plan white underbase for dark fabrics; include 2-3 mm bleed; use high-res print-ready formats (TIFF/PNG/PDF); color management; pre-press garment cleaning. |
| Step-by-step overview | Pre-press setup (320-330°F / 160-165°C), align shirt; position transfer; press 12-15 seconds with steady pressure; check peel type; post-press and cure; follow film guidelines. |
| Care and maintenance | Wash inside out in cold water, use gentle detergent; dry on low heat or air dry; avoid harsh chemicals to preserve finish; allow curing time. |
| Troubleshooting & tips | Verify color profiles and temperature windows; ensure even pressure and flat garment; re-press if needed; test on swatches; check white underbase decisions. |
Summary
UV DTF transfer on T-shirts offers a powerful way to create vibrant, detailed apparel with a professional look. By carefully preparing your artwork, selecting the right materials, and following precise heat-press settings, you can achieve consistent results that stand up to wear and washing. With practice, you’ll build confidence in your DTF transfer workflow and be able to scale up your production while maintaining color fidelity and durability. This approach is particularly effective for designers seeking a robust alternative to traditional methods and for those who want to master a true DTF transfer tutorial. Remember to tailor settings to your equipment and materials, monitor results, and iterate as needed to perfect your UV DTF transfer on T-shirts.