
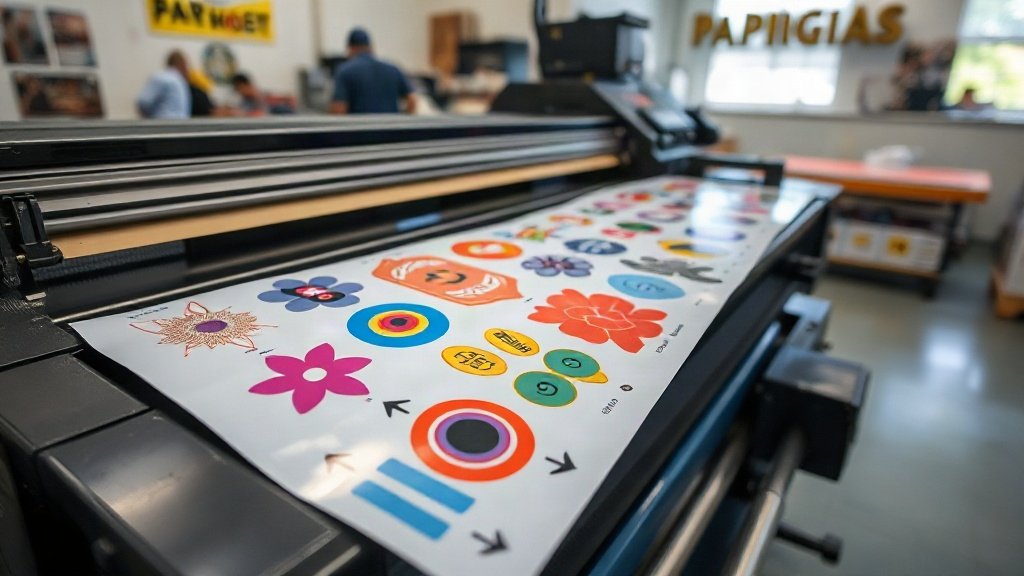
If you're into DTF printing, you've probably heard about gangsheets. But what exactly are they, and why should you care? In simple terms, a dtf gangsheet is a sheet where multiple designs are arranged together to be printed in one go. This method saves time, reduces material waste, and maximizes your printer's output. Whether you're a small business owner or a hobbyist, mastering gangsheets can take your DTF printing to the next level.
What is a DTF Gangsheet?
A dtf gangsheet is essentially a large sheet of DTF film that contains multiple designs nested together. Instead of printing each design individually, you combine them into one sheet, which is then printed, powdered, and cured in a single pass. This approach is a game-changer for efficiency, especially when you have many small designs or a high volume of orders.
Why Use Gangsheets?
Gangsheets offer several benefits that can directly impact your bottom line. First, they save time. Printing one sheet with many designs is much faster than printing each design separately. Second, they reduce waste. By nesting designs closely, you use less film and powder. Third, they lower costs. Less waste means more profit. Finally, they allow for consistent quality because all designs go through the same process simultaneously.
How to Create a DTF Gangsheet
Creating a gangsheet involves a few key steps. You'll need design software, a DTF printer, and the right materials. Here's a breakdown of the process:
1. Prepare Your Designs
Start by gathering all the designs you want to print. Ensure they are in a high-resolution format, preferably PNG with transparent backgrounds. Adjust the size of each design according to your needs. Remember that DTF printing requires mirrored images, so flip them horizontally before arranging.
2. Arrange Designs in Software
Use a layout tool like Photoshop, Illustrator, or dedicated RIP software. Create a canvas that matches the width of your DTF film roll (commonly 13, 17, or 24 inches). Place your designs on the canvas, leaving a small gap (about 0.1-0.2 inches) between them to prevent overlapping during cutting. Nest them tightly to maximize space.
3. Print and Process
Once your gangsheet is ready, send it to your DTF printer. After printing, apply hot melt powder evenly, shake off excess, and cure the sheet in an oven or with a heat press. Then, you can cut out each design and apply them to garments using a heat press.
Best Practices for DTF Gangsheets
To get the most out of your gangsheets, follow these expert tips:
- Optimize nesting: Use software with auto-nesting features to arrange designs efficiently.
- Mind the gaps: Leave enough space between designs for cutting; too close and you risk damaging edges.
- Group similar colors: If you're printing on a roll, group designs with similar color profiles to reduce ink changes.
- Test your layout: Before printing a full sheet, do a small test to ensure everything aligns correctly.
- Keep records: Note which designs work well together and the settings used for future reference.
Common Mistakes to Avoid
Even seasoned printers make mistakes. Here are pitfalls to watch out for:
- Overcrowding: Packing too many designs can lead to cutting errors and poor adhesion.
- Ignoring film width: Always match your canvas to your film roll width to avoid wasted space.
- Forgetting to mirror: Designs must be mirrored; otherwise, text will be backwards.
- Inconsistent powdering: Uneven powder application can cause patchy transfers.
Maximizing Efficiency with Gangsheets
Efficiency is the name of the game in DTF printing. By using gangsheets, you can significantly increase your daily output. For example, if you normally print 20 individual designs per hour, a gangsheet might allow you to print 50 or more in the same time. That's a huge boost for your business. Additionally, gangsheets reduce setup time because you're only loading the printer once for multiple designs.
DTF Gangsheet vs. Individual Prints
Let's compare the two approaches. Individual prints are simpler for one-off jobs, but they waste film and time. Gangsheets require upfront planning but pay off in speed and cost savings for bulk orders. If you frequently print multiple designs, gangsheets are the clear winner.
Tools and Materials for Gangsheet Printing
To create gangsheets, you'll need:
- A DTF printer (e.g., Epson converted or purpose-built)
- DTF film (roll or sheets)
- DTF ink
- Hot melt powder
- Heat press or curing oven
- Design software with nesting capabilities
Investing in quality materials ensures better results and fewer headaches.
Frequently Asked Questions
What is the ideal gap between designs on a gangsheet?
A gap of 0.1 to 0.2 inches is generally sufficient. This allows for clean cutting without risking overlap or damage to adjacent designs.
Can I reuse a gangsheet layout for different orders?
Yes, you can save your layout as a template and swap out designs as needed. This is especially useful if you frequently print similar items.
How do I prevent my gangsheet from curling during printing?
Ensure your film is flat and your printer's feed mechanism is clean. Also, avoid overloading the sheet with too many designs, as excessive ink can cause curling.
Is it possible to print gangsheets on a roll instead of sheets?
Absolutely. Many printers use roll-fed systems, which allow for continuous printing. You can create a long gangsheet on a roll, but be mindful of the roll width and your printer's capabilities.
What's the maximum size for a gangsheet?
The maximum size depends on your printer and film width. Common widths are 13, 17, and 24 inches. Length can vary, but practical limits exist based on your printer's memory and handling.
Mastering dtf gangsheet printing is a skill that pays off. With careful planning and the right techniques, you'll streamline your workflow, reduce costs, and impress your customers with fast turnaround times. So why not give it a try on your next batch of orders?