
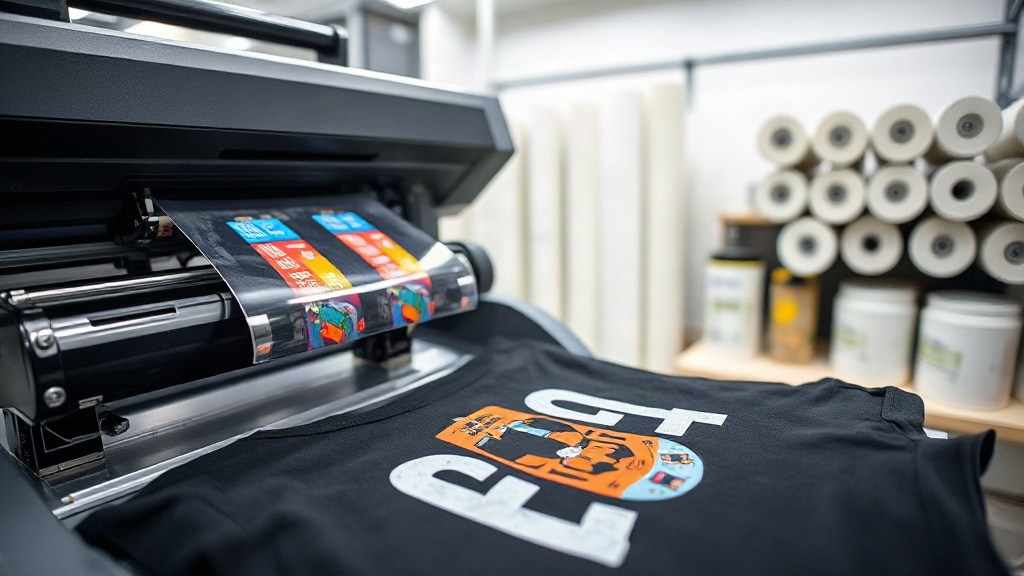
If you’ve been in the custom apparel game for any length of time, you’ve probably heard the acronym DTF popping up everywhere. Maybe you’ve seen it in printing forums, or a competitor started offering it. But what exactly is DTF printing, and why is it suddenly the talk of the town? In short, DTF (Direct to Film) is a printing method where your design is printed onto a special film, coated with adhesive powder, and then heat-pressed onto fabric. It’s a game-changer because it works on almost any fabric, from cotton to polyester to blends, and delivers incredibly vibrant, durable results. In this post, we’ll dive deep into how DTF works, why it might be the perfect solution for your business, and how to get started. Whether you’re a seasoned screen printer or a newbie with a heat press, understanding DTF can open up a world of possibilities.
What Exactly Is DTF Printing?
DTF stands for Direct to Film. It’s a relatively new printing technology that has quickly gained traction in the custom apparel industry. The process involves printing a design onto a special PET film using a DTF printer (which uses pigment-based inks). After printing, a fine layer of hot-melt adhesive powder is applied to the wet ink. The film is then cured, and the design is ready to be transferred to a garment using a heat press. The adhesive melts and bonds with the fabric, creating a strong, flexible bond.
One of the key differences between DTF and other methods like DTG (Direct to Garment) or screen printing is that DTF doesn’t require pre-treatment of the fabric. That means you can print on dark colors, polyester, and even treated nylon without the hassle of pre-treating. Plus, the colors are incredibly vivid because the design is printed on a white base layer (if needed) before the color layers. This allows for bright, opaque prints on any background.
Why DTF Is Gaining Popularity
The rise of DTF printing isn’t just hype. It solves several pain points that have plagued custom apparel printers for years. Let’s break down the main advantages.
1. Works on Almost Any Fabric
Unlike DTG, which works best on 100% cotton, DTF adheres well to cotton, polyester, blends, and even leather. This versatility means you can offer a wider range of products without investing in multiple printing technologies.
2. No Pre-Treatment Required
Pre-treating garments is time-consuming and can be messy. With DTF, you skip that step entirely. Just print, powder, cure, and press. This saves time and reduces the risk of inconsistent results.
3. Vibrant Colors and Fine Details
DTF printers can produce high-resolution prints with smooth gradients and fine lines. The white ink layer ensures that colors pop even on dark garments. Whether you’re printing a detailed photograph or a simple logo, the result is crisp and eye-catching.
4. Durable and Wash-Resistant
When applied correctly, DTF transfers are extremely durable. They stretch with the fabric without cracking, and they hold up well after multiple washes. This makes them ideal for items that get a lot of wear, like sports jerseys or work uniforms.
5. Cost-Effective for Small and Large Runs
Unlike screen printing, which requires separate screens for each color and has a high setup cost, DTF is digital. There’s no minimum order quantity, and you can print one-offs or large batches with ease. The cost per print is also competitive, especially when you factor in the lack of pre-treatment and minimal waste.
How Does the DTF Process Work Step by Step?
Understanding the workflow can help you decide if DTF is right for your shop. Here’s a typical process:
- Design Preparation: Create or adjust your artwork in a graphics program. Ensure it’s mirrored (unless your printer software does it automatically) and set to the correct size.
- Printing: Load the DTF film into your printer and print the design using DTF inks. The printer lays down a white base layer (if necessary) and then the color layers.
- Powdering: While the ink is still wet, apply hot-melt adhesive powder evenly over the print. Shake off excess powder.
- Curing: Place the film in a curing oven or under a heat source to melt the powder. This typically takes a few minutes at around 160°C (320°F).
- Transfer: Set your heat press to the recommended temperature (usually 150-160°C) and pressure. Place the transfer on the garment and press for 10-15 seconds.
- Peel: Wait for the transfer to cool completely (cold peel) or peel while hot (hot peel) depending on the film and adhesive used. Most DTF transfers are cold peel for best results.
Each step requires attention to detail, but once you dial in your settings, the process becomes second nature.
DTF vs. Other Printing Methods: A Quick Comparison
To help you see where DTF shines, here’s a comparison with DTG and screen printing.
- DTG: Best for 100% cotton, requires pre-treatment, great for small details but can be less vibrant on dark colors. DTF works on more fabrics and doesn’t need pre-treatment.
- Screen Printing: Cost-effective for large runs, but setup costs are high and not practical for small batches. DTF is digital, so no setup, and it’s great for small to medium runs.
- Vinyl: Good for simple designs, but limited in color and detail. DTF can handle complex, multi-color designs with ease.
Of course, each method has its place. But if you’re looking for versatility, DTF is hard to beat.
Common Challenges and How to Overcome Them
Like any technology, DTF has its quirks. Here are a few common issues and tips to solve them.
- Adhesive powder not sticking: Ensure the ink is wet enough. If your printer lays down too little ink, the powder won’t adhere. Adjust your printer settings to increase ink density.
- Cracking after washing: This usually happens if the transfer wasn’t pressed long enough or at the right temperature. Increase pressure and time slightly, and make sure the garment is properly supported.
- Colors look dull: Check your white ink layer. If it’s too thin, colors won’t pop. You may need to increase the white ink density or print two layers.
- Film curling: Store film in a dry place and avoid touching the print area. Curling can cause misalignment during pressing.
With a bit of experimentation, you’ll find the sweet spot for your setup.
Getting Started with DTF: What You Need
If you’re ready to dive into DTF, here’s a basic checklist of equipment and supplies:
- A DTF printer (e.g., Epson converted or dedicated DTF printer)
- DTF ink (CMYK plus white)
- PET film (cold or hot peel)
- Hot-melt adhesive powder
- Curing oven or heat gun
- Heat press
- Design software
Start with a small setup to test the waters. Many suppliers offer starter kits that include everything you need. Also, consider joining online communities to learn from others’ experiences.
Frequently Asked Questions About DTF Printing
How long do DTF transfers last?
When applied correctly, DTF transfers can last as long as the garment itself. They withstand dozens of washes without fading or cracking. For best results, wash inside out in cold water and avoid harsh detergents.
Can I use DTF on 100% polyester?
Absolutely. DTF is one of the few methods that work well on polyester, including athletic wear and sublimated fabrics. The low pressing temperature (around 150°C) prevents scorching.
Do I need a special printer for DTF?
You can convert an Epson printer to use DTF inks, but dedicated DTF printers are also available. They come with modified printheads and ink systems designed for the thicker pigment inks. If you’re serious, a dedicated printer is a better investment.
Is DTF more expensive than DTG?
The cost per print for DTF is often comparable to DTG, but you save on pre-treatment and can use cheaper blanks (polyester). For small runs, DTF is usually more cost-effective.
What’s the difference between hot peel and cold peel film?
Hot peel film allows you to remove the film immediately after pressing while it’s still hot. Cold peel requires you to wait until it cools. Cold peel generally gives a smoother finish and is more common for DTF.
Final Thoughts
DTF printing is more than a trend; it’s a robust solution that addresses many of the limitations of older methods. Its versatility, vibrant results, and cost-effectiveness make it an attractive option for both beginners and established shops. As with any new technique, there’s a learning curve, but the payoff is well worth it. So why not give it a try? Your customers will love the quality, and you’ll love the flexibility.