
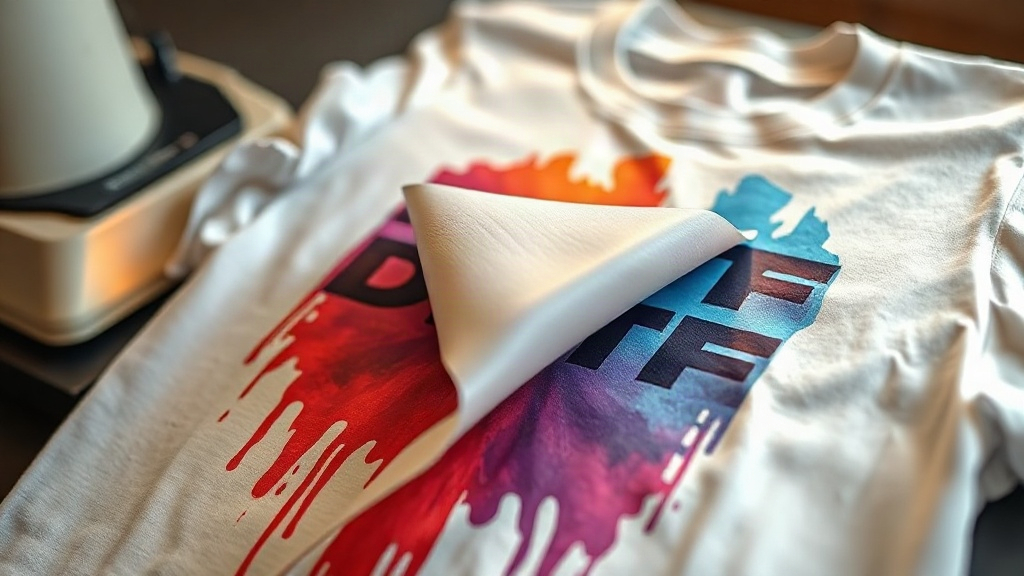
If you've been exploring custom apparel printing, you've likely encountered DTF Transfers. This innovative technology is rapidly gaining popularity for its versatility and vibrant results. Unlike traditional methods that require specific fabrics or complex setups, DTF transfers offer a straightforward way to bring your designs to life on a wide range of materials. Whether you're a small business owner, a hobbyist, or just curious about the latest printing trends, understanding DTF transfers can open up new creative possibilities. In this guide, we'll walk you through the entire process, from preparing your artwork to applying the final transfer, and share expert tips to help you achieve professional-quality prints every time.
What Are DTF Transfers?
DTF stands for Direct to Film. It's a printing method where your design is printed onto a special film, coated with a powder adhesive, and then heat-pressed onto the fabric. The magic lies in the adhesive powder, which melts and bonds the ink to the fabric, creating a durable, stretchable print. Unlike DTG (Direct to Garment) printing, which requires pretreating and works best on 100% cotton, DTF transfers can be applied to almost any fabric, including cotton, polyester, blends, and even leather. This versatility makes DTF a game-changer for custom apparel.
How DTF Transfers Differ from Other Methods
Compared to screen printing, DTF transfers don't require expensive screens or setup for each color. This makes them cost-effective for small batches and detailed designs. Unlike vinyl cutting, DTF transfers can reproduce complex gradients and photographic images with ease. And unlike DTG, DTF doesn't need pretreating, saving time and reducing chemical use. The result is a soft, flexible print that withstands washing and stretching, ideal for t-shirts, hoodies, tote bags, and more.
The DTF Transfer Process Step by Step
Understanding each stage helps you troubleshoot and perfect your technique. Here's what happens from digital file to finished garment.
1. Design Preparation
Start with a high-resolution image, ideally 300 DPI. DTF printers use CMYK inks plus white, so your design should be in CMYK or RGB color mode. Remember that the white ink layer is printed underneath the colors to make them pop on dark fabrics, so transparent backgrounds are fine. If your design has fine details, ensure they are at least 1-2 points thick to print clearly. Once your file is ready, you'll print it onto the DTF film using a specialized printer.
2. Printing and Powdering
The printer lays down the CMYK colors first, followed by a white ink layer. While the ink is still wet, the film passes through a powder shaker that applies a thermoplastic adhesive powder. The excess powder is shaken off, and the film goes through a curing oven to melt the powder. This creates a smooth, dry adhesive layer that will bond with the fabric during heat pressing.
3. Heat Press Application
Set your heat press to the recommended temperature (usually 300-325°F or 150-160°C) and pressure (medium to firm). Place the garment on the press, position the transfer film with the design facing up, and press for 10-15 seconds. For the best results, use a heat press rather than an iron, as consistent temperature and pressure are crucial. After pressing, wait for the film to cool completely before peeling it off. If the design peels off with the film, it wasn't pressed long enough or hot enough.
Choosing the Right Fabric and Transfer
Not all fabrics and transfers are created equal. To get the best results, consider these factors.
Fabric Compatibility
DTF transfers adhere well to cotton, polyester, nylon, and blends. However, fabrics with a heavy texture, like ribbed knits or canvas, may require extra pressure to ensure the transfer reaches into the grooves. For stretchy fabrics, look for DTF transfers labeled as stretchable or use a transfer with a high elastic adhesive. Always test on a scrap piece first.
Transfer Quality
When purchasing DTF transfers, quality matters. Look for transfers printed with high-quality inks and a consistent adhesive coating. Cheap transfers may crack, fade, or peel after a few washes. If you're printing your own, use reputable DTF film and powder. At DTF Print Kit, we offer premium supplies to ensure your transfers are vibrant and durable.
Tips for Flawless DTF Transfers
Even with the right equipment, small mistakes can ruin a print. Here are some expert tips to help you succeed.
- Pre-press your garment: This removes moisture and wrinkles, ensuring the transfer adheres evenly.
- Use the correct pressure: Too little pressure and the transfer won't bond; too much and the design may spread or the fabric may scorch.
- Peel correctly: Most DTF transfers are cold peel, meaning you wait until the transfer is completely cool before peeling. Some are hot peel; check the instructions.
- Wash inside out: To extend the life of your print, wash the garment inside out in cold water and tumble dry low.
- Store transfers properly: Keep unused transfers in a cool, dry place away from direct sunlight to prevent the adhesive from degrading.
Common DTF Transfer Problems and Solutions
If you encounter issues, don't panic. Most problems have simple fixes.
Transfer Not Sticking
If the transfer peels off with the film, the likely culprits are insufficient temperature, pressure, or time. Increase the temperature by 5-10°F and press for a few seconds longer. Also, ensure your garment is flat and free of wrinkles.
Cracking or Fading
Cracking usually occurs if the transfer is stretched too much during application or if the garment is washed in hot water. Use a stretchable transfer for stretchy fabrics and follow care instructions. Fading can happen if the transfer is exposed to harsh chemicals or excessive heat.
Adhesive Residue
Sometimes a sticky residue remains on the garment after peeling. This is usually harmless and will disappear after the first wash. If it bothers you, cover the print with a Teflon sheet and press again for a few seconds.
Applications of DTF Transfers
DTF transfers are incredibly versatile. They're perfect for custom t-shirts, hoodies, sportswear, and promotional items. Because they can be applied to hard-to-print fabrics like polyester and nylon, they're ideal for team jerseys and activewear. Small businesses love DTF for on-demand printing, as they can offer a wide range of products without holding inventory. Even home crafters use DTF to create personalized gifts.
Frequently Asked Questions About DTF Transfers
Can I use DTF transfers on dark fabrics?
Yes, DTF transfers include a white ink layer that makes colors vibrant on dark fabrics. The white layer acts as a base, so the colors don't get lost.
How long do DTF transfers last?
With proper application and care, DTF transfers can last as long as the garment itself. They withstand dozens of washes without cracking or fading, especially if you follow the care instructions.
Do I need a special printer for DTF transfers?
Yes, you need a DTF printer that uses DTF inks and can print white ink. However, if you don't want to invest in a printer, you can buy pre-printed DTF transfers from suppliers like DTF Print Kit.
What is the difference between DTF and DTG?
DTF transfers are printed on film and then applied to the fabric, while DTG prints directly onto the garment. DTF works on more fabrics and doesn't require pretreatment, but DTG can be more cost-effective for 100% cotton in large quantities.
Can I stretch DTF transfers?
DTF transfers are somewhat stretchable, but for high-stretch fabrics like spandex, choose a transfer designed for stretch. Applying with less pressure and ensuring the adhesive is fully melted can also help.
With this guide, you're well on your way to mastering DTF Transfers. Remember, practice makes perfect, so don't be afraid to experiment. For high-quality DTF supplies and transfers, visit DTF Print Kit.